Here is a wonderful and oh so sweet recycled project:
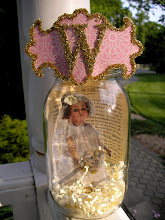
Outdoor Christmas Light Bulbs Dolls.
The base is made from a burnt out/discarded Christmas light bulb from the outside light garland, they are a bit larger then the indoor ones. Every year bulbs go out due to the weather, I never throw them out because they are just too unique to do so, yet all they do is sit in a box waiting to be resurrected into something other then their original purpose. This all changed yesterday.
As I was creating a project for a customer, I came across the box of discarded light, I picked a few out and placed on my table, a few rolled into some picture cutouts and boom, a light went off, lol, literally in my head and the Bee Squad was born.
These sweet bees can be created in a variety of themes: Storybook Kitsch, Fairytale, 60's Mod, 80's Bright, Vintage and Tinsel, Steampunk and Metal, Seaside Chic, I'm currently making some Mermaid ones now, the possibilities are endless, a perfect project to create w/kids or friends.
Materials:
-Christmas Garland Light Bulbs (replacements are sold in 3 & 4 packs)
-Scrapbook Paper
-Vintage Greeting Card Images (I used images from greetings collage cd available in my store)
-Trims, Ribbons
-Acrylic Paints
-Modge Podge Matte Finish
-Hot Glue, Hot Glue Gun
-Other: Millinery Flowers, Crepe paper, Clothes Pins
Directions:
1. Grip the metal area of the light bulb with the clothes pin this will help you paint
your bulb.
2. Paint the bulb with a coat of Modge Podge in Matte, let thoroughly dry. Then
paint a striped pattern w/acrylic paint, let dry.
3. Attach a vintage head image of your choice to the metal portion of the bulb using
hot glue.
4. Trace 2 long oval shapes onto scrapbook paper, cut out and glue to the back of
the bulb for the wings.
5. Embellish the bee with trims for the crown, millinery and crepe paper.
Tips and Tricks:
-Use a thick tacky glue in place of the hot glue when working w/children.
-Cut out vintage images of your family or friends in place of the greeting card
images.
-Have your children draw faces or cut from a coloring book in place of the greeting
card images.
-Coat the bulbs in glitter.
-For Steampunk Look: paint the bulbs with metallic paints in gold, silver, bronze,
copper, add gold leafing and a grunge glaze, attach a doll head, clay head or
Victorian image, add clock parts, dials, etc.
Hope you enjoyed my fun project!
xoxo
Lisa and the Bee Squad



















6 comments:
So cute!
I have a little cigar box with some old night lights that saved... Can't wait to try this:)
Darling Lisa!! I adore your little bee girls! Brilliant idea with the bulbs! :) xo,Jenn
They are adorable, Lisa! Love them!
this is absolutely the sweetest!!! I can see them on an Easter tree with flowers and eggs too! simply brilliant!!
xxoo
Vanessa
Thanks sooooooo much everyone! Sending lots of hugs and good wishes your way!
xoxo
Lisa :-)
Thank you for such a CUTE idea using old bulbs. I've got a ton of them that a Sr. Citizen Center was throwing away. I couldn't bear to see it, so I bought them all, thinking one day I could make them into something new.
Funny too, the scrapbook paper you used as a background is just what I used to line that back of my daughter's bookshelf. She picked it out and it looks great as a backdrop for her old Charlie Brown books.
Post a Comment