Showing posts with label up-cycled. Show all posts

Sunday, April 22, 2012

Fabric Remnant Banner
Piddlestixs Banner!
My store Piddlestixs, is almost 150 years old, its housed inside a former theater/playhouse, WWI weight station and General Store, so it has lots of character and history. The decor of my store Piddlestixs is unique and houses many eclectic themes from Wonderland, Circus, Kawaii, Tea and Steampunk/Apothecary. Piddlestixs has lots of re-cycled and up-cycled items and supplies for sale. In deciding on what kind of store banner I wanted in the front of the store, I opted for a vintage style banner to keep with the various themes and history of the store, the result was a banner using fabric remnants, chipboard lettering, seam binding and silver German glass glitter.Piddlestixs Banner! 2
Materials

-2 sizes of fabric remnants, (found in fabric sample books or you can use fabric scraps)
-Black seam binding or silk ribbon
-Crushed velvet ribbon
-Decorative chipboard lettering
-German glass glitter, silver 
-Glue: hot glue, modge podge
-Tools: hot glue gun, scissors, pinking sheers and pain brush
Piddlestixs Banner!  3
Directions

1. Decide on the name for your banner, I chose Piddlestixs, which is 11 letters, so I counted 11 larger pieces of scrap fabric and lined on the floor. Repeat this step for the smaller set of scrap fabric pieces.


2. If your remnants aren't already pinked, use pinking sheers and trim 3 sides of each of the remnants both large and small.


3. Measure a long strip of black seam binding or silk ribbon,  place over the larger remnant's top edges, now hot glue to the large remnant.


4. Next hot glue the smaller remnant piece over the ribbon and the larger remnants.

5. Line the top of the smaller remnants with crushed velvet trim, for a more finished look.


6. Now add your chipboard lettering to each layered remnant, hot glue in place, coat with modge podge and german glass glitter.
Piddlestixs Banner!  4Piddlestixs Banner!  5Piddlestixs Banner! 6
Tips/Tricks
-Use Fabric tac in place of the hot glue.
-Use caution when using hot glue.
-Use wood letters in place of chipboard lettering
-Use scraps of fabric, sheets, bedding, curtains, table cloths or clothes in place of remnant books.
Piddlestixs Banner! 7Piddlestixs Banner! 8Piddlestixs Banner! 9Piddlestixs Banner! 10
The possibilities are endless, this is a great recycle/upcycle project using items you might already have lying around  the house, studio or store!


Enjoy,
XOXO
Lisa!

Friday, March 30, 2012

Up-Cycled Magic!
Up-Cycled Frou Frou Cabinet!I restored this old cabinet, it was originally an ugly black and gray piece. I painted it with left over paints from Lowe's: coconut white and a light salmon pink. I choose to paint the inside the coconut white.

The top right corner was missing a ledge corner, the center was missing 2 medallions and had no knobs.

I molded the left corner edge of the piece, then poured with plaster, and attached to the right corner using wood putty and a few layers of spackle, once dried I sanded it!

Next I made another mold of the 2 medallions, poured it w/plaster and attached to the center doors with clear caulk, then I sanded some parts of the whole piece to show the original black paint that was underneath.

Finally
I went to Lowe's and grabbed 2 crystal cabinet knobs, then attached them to the top drawer of the cabinet and to the center door. Now it plays host to my jewelry boxes and jeweled treasures.
Up-Cycled Frou Frou Cabinet! 2
Up-Cycled Frou Frou Cabinet! 3This is actually a simple project you can finish in a weeked with in-expensive materials. I bought the cabinet for $5 because it was damaged. The paint was $3 a can since it was left over paint, the knobs were $2 each, the mold compound was $10 with a coupon, the plaster of paris was $3, Spackle, wood putty and clear caulk were left overs from another project, total for finished fabulous chic piece: $25 including the tax for everything!
Up-Cycled Frou Frou Cabinet! 4Up-Cycled Frou Frou Cabinet! 5Up-Cycled Frou Frou Cabinet! 6Up-Cycled Frou Frou Cabinet! 7
This is a project you can do to old bathroom or kitchen cabinets, visit a dumpster, local junk/salvage yard, surplus store, thrift store, rummage/garage sale, etc. for furniture to re-do!

Happy Weekend!
XO
Lisa!
Thursday, October 13, 2011

Curbside Find, Up-Cycled!
New area at Piddlestixs! 2I live to recycle/upcycle items to use in my works, my displays and my decor, Something always has a purpose no matter what. Recently it was clean up week in my area, and to my delight I came across some amazing pieces to re-finish and up-cycle to a new use. Here is one of those finds, a hutch top, that really only needed some sanding and paint.Curbside Pickup! 2After seeing this, I hauled it over to my store, carried it up the stairs and started sanding it. I then washed it off and began its first coat of paint in creamy dove followed by a sweet taffy blue color for the trim, here is the result!Curbside find re-finished!Curbside find re-finished! 2After the paint dried I placed it into my store in a new area designated for girly girl, pink, 50's kitch and pastel color items all vintage and new.New area at Piddlestixs!New area at Piddlestixs! 3Here are some close ups of the shelf vignettes!New area at Piddlestixs! 4New area at Piddlestixs! 5New area at Piddlestixs! 9Hope you enjoyed my newest upcycled design! Have a magic filled day!

P.S. Come on over and visit us at Piddlestixs!

Thursday, September 29, 2011

Up-Cycled Ruler Frame!
Up-cycled Frame! 6Up-cycled Frame!
Here is a frame I up-cycled using a wood frame, photocopies of vintage rulers, hardware and glue.
Up-cycled Frame!
Materials:
-Wood frame
-Vintage ruler photocopies or originals
-Vintage or modern metal hardware/findings
-Mod Podge or decaupage medium of choice
-Matte sealer
-Epoxy glue
-Foam brush or paint brush
-Scissors

Directions:
1. Cut ruler images to fit frame, glue in place with mod podge using a foam brush, let dry.
2. Apply matte sealer or finish of choice using foam brush or paint brush, let dry.
3. Attach hardware to frame corners using epoxy glue, let set about 10 minutes.
4. Insert vintage or modern photograph into your frame and enjoy.
Up-cycled Frame! 4Up-cycled Frame! 3Up-cycled Frame! 2
Tips:
-Use original vintage rulers instead of photocopies, glue to frame w/epoxy glue or clear caulk.
-Use measuring tape instead of rulers.
-Age frame with antiquing medium.
-Jazz up frames w/steampunk pieces, rhinestones or broken jewelry.
Up-cycled Frame! 5Up-cycled Frame! 7

Sunday, September 25, 2011

Up-Cycled Project: Wicker Shelf turned Arsty!
Up-cycled project, wicker shelfTurn a boring wicker or rattan shelf into an artsy piece. All you need is a wicker shelf, which can be found at most thrift stores, garage sales or probably in your attic, some glue, water, foam brush and recycled book pages, music sheets or newspaper.
Up-cycled project, wicker shelf 7 Step One, Mix 3 parts all purpose glue w/one part water, stir with foam brush, set aside.Up-cycled project, wicker shelf 6Step Two: Gather pieces of recycled ephemera such as book sheets, dictionary pages, music sheets or newspaper.Up-cycled project, wicker shelf 2Up-cycled project, wicker shelf 3Step Three: Coat wicker with homemade decaupage glue medium using foam brush, saturate paper with glue and press onto wicker, brush additional medium onto the paper, repeat until the whole shelf is coated in paper, let dry.Up-cycled project, wicker shelf 4Up-cycled project, wicker shelf 8Step Four: Coat piece w/sealer or finish of choice, then start adding your fave items to it.Vintage goodies at PiddlestixsHere is my finished shelf used as a display for some artful goodies at Piddlestixs!
Tips:
-Add die cuts, silhouettes or dresden scraps/trims to your shelf.
-Add broken jewelry, paper pinwheels or trim to your shelf.

The possibilities are endless. Remember recycling something can be rewarding and save you money too!

Magic and Joy,
Lisa!c

Tuesday, March 22, 2011

The Original Baseball Cuff is Back!
Baseball Cuffs: Custom Order! 6

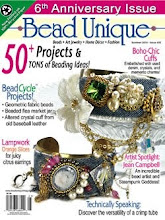
Are you ready for opening day? Will you be wearing your B-Cuff? The B-Cuff is in its 5th season and getting ready for Opening day in a few weeks. Many of you have been following the cuff from its beginning, ordering them to wear, and reading about the similar styles like my article and project idea in last Spring's Bead Unique Magazine.
Baseball Cuffs: Custom Order!Baseball Cuffs: Custom Order! 4
The Cuff is on the rise again with more variations, articles and in a published book, all coming out this year.

Who doesn't want to be Queen of her own Baseball Game? Now you can with custom baseball cuffs created to fit your teams colors or the theme of your choice.


The cuffs are created from leather baseballs, rhinestones, felt, clasps, sewing, etc.

All cuffs fit standard wrist size, if your wrist is larger, the cuff can be adjusted to fit your wrist specifications.

I have been making these cuffs for years for customers, friends and family. These cuffs are the original, one and only, Lisa Kettell Baseball Cuff aka the B-Cuff. All Baseball cuffs are original to my idea, creation and design, no two are alike and when you wear one can signify your love for the game with style and a bit of Glam, lol!Baseball Cuffs: Custom Order! 5Baseball Cuffs: Custom Order! 7

PLEASE NOTE:

I now have pink baseballs in stock, these go fast, so check for availability on this color and see what dyes are in to match your team.

Most of the baseballs I use are vintage ones from game left overs and lots.
Baseball Cuff: Custom Order for Jean! 4Baseball Cuff: Custom Order for Jean!


To order, click below:

Custom Baseball Cuff Order Link

Bracelets are $40.00 plus $2.95 shipping/handling
Total: $42.95

Order 2 or more and save additional money!
Please allow 2 weeks for delivery, if a rush order, please inform me!

Any Questions, please let me know,

Magic and Joy,
Lisa!
Buy 2 or more and receive $10.00 off

Price:
Baseball Cuffs: Custom Order! 2


Saturday, January 08, 2011

Old Frame Display Project!
Old Frame Display! 10
For the past few months I kept looking at these big, grungy and ornate frames sitting in the back room, 1 was from my good friend Joyce, who owns a store across the street from me called Rose Petal Porch. Joyce said take this, if anyone can give new life to it, you can. Well it sat for a few months before I gave it new life.

My mom needed a new display for her steampunk jewelry, then it hit me, this big old frame was perfect for steampunk and grunge chic, hence the creativity began and this piece was the result. These are extremely easy to make and can be turned into a jewelry display w/pearl pins, use for a brooch display, turn into a creativity/inspiration board for your studio or office, attach your fave artworks to, possibilities are endless, so let's get started and see what you need to make your own!
Old Frame Display!
Materials:
-Old frame or new one, size of choice
-Fabric remnants, enough to cover the inside of frame
-Matte board or chipboard
-Batting
-Frame wire
-Hot glue, hot glue gun
-Quick grip, Beacon Adhesives
-Frame nails or thin nails you might have
-Tools: Hammer, exacto knife, scissors, ruler, pencil

Directions:
1. Measure the inside of your frame, (where the opening is), then draw the measurements onto matte board twice, cut out both using an exacto knife.
Old Frame Display! 3Cut Matte BoardOld Frame Display! 4Fabric of choice
2. Take one of the cut boards and layer with batting, next cover the batting with fabric of choice, fold over one section of fabric at a time, hot glue in place, until fabric and batting are secure and sealed to the board.
Old Frame Display! 6Applying the batting
Old Frame Display! 5Layering fabric over the batting and board
Old Frame Display! 7Hot gluing fabric to board
3. Turn the frame to the back side, now border the whole inside lip of the frame with quick grip, insert the covered fabric board into the lip, press into the glue and let dry for a few hours.
Old Frame Display! 8Applied Quick Grip and inserted into frame
4. Once the first board is secured, layer the second board onto the back of the unfinished side for a professional look. Attach board with frame nails and hammer, or use more quick grip.
5. If you want to hang the display board, attach doubled wire to the back using nails or leave alone and stand up against the wall.
6. Now your frame is ready for any extra embellishments such as crystal knobs, ornate hardware, etc. Then display the items of your choice on it!
Old Frame Display! 9Final piece

Tips:
-These displays can be made in all frame sizes and with all color patterns
-Spray paint or use latex paint to paint your old frame
-Try using a cork board and just layer and glue into the edges of the cork board

The batting backing in this project allows you to use stick and tapestry pins to attach your items to!

Magic and Joy,
Lisa!