Wednesday, April 08, 2015

Popsicle Stick Glam Bracelets

Popsicle sticks have reached a new high. We all know they work well in kids craft projects, but what about taking them to another level, wood bracelets. Thin wood can bend fairly well without splintering when placed in a hot water bath for a few minutes. When the wood is completely saturated in hot water it can bend.

With a few simple supplies you can bend popsicle sticks into fabulous bracelets for both adults and children. Once bent, stamp on them, roll in glitter, paint, wrap in paper or decoupage. This project is so fast and easy to make, so let's get started.
Materials:
  • Jumbo wooden craft popsicle sticks
  • Ornate wrapping paper or large sheet paper, Paper Source
  • Clip-on earrings, Forever 21 
  • Velvet ribbon, Simplicity
  • Drinking glasses or mugs
  • Glues; hot glue, industrial glue, modge podge, Plaid
  • The popsicle sticks inserted into glasses and drying for 24 to 32 hours.
  • Tools: hot glue gun, scissors, large pot, foam brush

Directions:

  1. Fill a large cooking pot with water, bring to a boil, drop popsicle sticks into boiling water, let boil for around 10 minutes. Reduce heat and let soak in the hot water for 5 more minutes.
  2. Remove popsicle sticks from water using tongs, let cool a minute. 
  3. Begin slowly bending the popsicle sticks and insert them into a glass or mug. Bend them into rounded shapes that fit around the inside of the glass or mug. You can even wrap one around the glass or mug and hold in place with elastic band or wire.
  4. Let dry for 24 hours to 32 hours, so they dry and hold their shape. Remove from glasses.
  5. Brush modge podge onto the front of the rounded popsicle stick. Fold a piece of paper over it. Let dry.
  6. Cut any extra paper and glue the ends on the back of the bracelet. 
  7. Hot glue 2 pieces of velvet trim to each end of the bracelet.
  8. Add a clip on earring to the center and your bracelet is ready to wear.
Tips/Tricks:
  • Add a bunch of popsicle sticks to the boiling water, as a few may break.
  • Always be careful when working with hot water or hot glue.
  • Try covering bracelets with washi tape, rub on transfers, stamps and vintage ephemera.
  • Paint or ink your bracelets and use rubber stamps to create wording or design of choice.
Hope you enjoyed this fast and fun project.  There are a ton of popsicle stick projects available on the web. This is my version of a classic kids project, made for adults.

More projects on the way and the new blog is coming along!
xoxo
Lisa

Monday, April 06, 2015

Patriotic Splash, Paper Cone Tutorial

"The American Flag is a symbol of our freedom, national pride and history" -Mike Fitzpatrick


"Patriotic Splash" is a paper project inspired by the seashore, vintage Boardwalk, and primitive summer patriotic holidays! This huge paper cone was made the w/sails and shells sampler pack from Canvas Corp., paper straws, wood accents, vintage ephemera and stained ribbon using Tattered Angels.

I recently came across a box of vintage ephemera containing old patriotic costumes, bathing beauty scenes, and seaside amusement. All ornate, detailed and some had color. Blues, whites, tans and creamy reds. Everyone of them screamed old boardwalk, old patriotic Americana with Memorial Day, Fourth of July and Labor Day scenes by the seashore. So inspiring and fun. The result was this project and a few others I will post soon, think bathing beauties and flags.

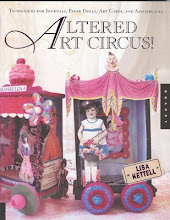
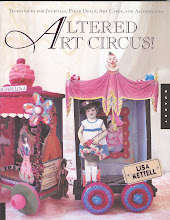
To make your own paper cone you could photocopy the template out of my mixed media art book: "Altered Art Circus", Quarry Books, Lisa Kettell. If that''s not available to you, here is the full set of instructions to make a paper cone and this project.

Materials:

Directions:

  1. Starting from one corner, roll a 12 by 12 inch piece of scrapbook paper into a cone shape. Hot glue in place and cut any excess paper. Fill with light blue paper shreds, set aside.
  2. Hot glue a 12 inch piece of white paper floral wire to each end of the paper cone, arching it around the front. Cut various square shape images from the scrapbook paper, and hot glue to the white paper floral wire to form a banner.
  3. Attach a crescent moon shape to a paper straw to make a wand, set aside.
  4. Begin dying white or light color cotton ribbon with fine wood spray ink. Spray until desired ink color is achieved, let dry. Then tie to the crescent moon wand and insert into the paper cone, hot glue in place. 
  5. Cut a 2 inch by 12 inch strip of seer sucker scrapbook paper from the scrapbook paper pack. Begin cutting fringe into the cut paper strip, when complete, hot glue to the paper cone rim.
  6. Layer your cone with more images cut from the scrapbook paper, vintage image and ephemera.
  7. Make a paper fan rosette from the scrapbook paper, add that to the paper cone.
  8. Finally embellish with German glass glitter and a wire to hang your paper cone. 

  9. Tips/Tricks:
  • You can make smaller sized paper cones, paper cone wreaths, paper cone banners.
  • Turn your cone into a seaside party hat or large table center piece.
  • Add shells and more ephemera to your paper cone.
  • Distress your paper with more inks. 


    I hope you enjoyed this project and get inspired to make your own version.


    Happy Monday,

    Lisa xoxo

Saturday, April 04, 2015

DIY Peeps Wands

Its that time of year, Easter and Peeps.  I love the adorable shape and sweet taste.  I needed a way to preserve these sweet delights to enjoy year round, the result Peeps as craft embellishments.  Using peeps in crafts is a great way to recycle any leftovers that never made it to the mouth, lol.

Every year I head to store and purchase a stash as soon as they become available for purchase. I save some for sharing at the Easter table, the others I open up the packaging and let air dry for a week so they are ready for crafting.

This project is fast an easy to do using paper straws, stale peeps, and lace ribbon ( I dyed with Rit Dye).  If you are looking for a creative way to serve edible peeps at the Easter dinner table, you can repeat this craft without glue and with fresh peeps opened the day of Easter. Sprinkle with edible glitter or colored sugar for more pizzazz.

To make your own Peeps Wands visit my step by step project on the Rit Studio site by clicking on this link: DIY PEEP WANDS

Other projects you can make are cards embellished with peeps, Spring/Easter assemblages, garland, banners.  Line a wooden frame with peeps.  What about peeps jewelry? Or how about peeps in a jar. Peeps in a box or peep crowns.

If you can't resist the urge to not eat your peeps for craft purposes, then make your own out of air dry clay such as model magic from Crayola.

 Hope you felt all the cuteness from these projects and head over to my tutorial at RitStudio.com to make your own.

xoxo
Lisa

Thursday, April 02, 2015

Come Sail Away, DIY Large Driftwood Boat


"Come Sail Away" with me on a seaside adventure. This project is for a large 3 foot driftwood schooner boat made w/products from Canvas Corp Sails & Shells line, 7Gypsies trinkets, ink from Tattered Angels, shells and driftwood I found last week near my house. This boat is now sitting proudly in my loft space!
The benefits of living in NJ, means quick access to many lakes, and the shoreline. Some rivers such as the Raritan river stream to the bay, which extends into the Atlantic ocean at the Perth Amboy points of the state. Whenever I get the chance, I head over to Duke Island Park to explore and look for natures gifts and washed up treasures such as sea/river glass, tile shards, coins, shells and drift wood, which stream up line from the bay and wash up onto the land edges.


After a storm or high water, is the best time to explore, as new treasures surface. I never know what I will find on my exploration. This always leads to inspiration and a bevy of project ideas such as this project. After receiving a fabulous package of paper and goodies from Canvas Corp., line of products, I new my found objects would become a form of art.

I stumbled onto several pieces of driftwood, and new they were destined to become a large boat assemblage, the result this project; "Come Sail Away".
 Materials
  • 2 large pieces of driftwood or thick tree branches
  • Scrapbook paper, Sails & Shells Sampler Pack, Canvas Corp 
  • Findings, clothes pins, 7 Gypsies
  • White paper floral wire, seer sucker bakery twine (Hemptique), trims and muslin fabric ribbon
  • Shells, tiny starfish 
  • Parchment color treat box, vintage sailor ephemera
  • Inks from Tattered Angels (fine wood, aged mahogany)
  • Tools; scissors, hole punch, thin nails, hammer, hot glue and hot glue gun
  • Extras/Optional: German glitter, small branches, tags, metal grommets, grommet setter, ink pad and number/letter stamps, cotton pad or cheese cloth for inking

Directions
  1. Decide which piece of driftwood will be the base and which one will go on top.  Then hammer thin nails into the two pieces of driftwood to hold in place. I used 3 nails. Hot glue any openings for extra durability.
  2. Crinkle a piece of parchment earthy color paper from the scrapbook sampler pack, punch two holes into one side of the paper. (one hole at the top, one hole at the bottom).
  3. Cut 2 pieces from fabric ribbon measuring 12 inches each. Thread through each punched hole and tie onto the upward piece of driftwood.  
  4. Hot glue a treat box to the middle of the upward piece of driftwood. Insert a small branch into it, decorate with tiny shell, vintage sailor image and wording from the paper sampler pack. Again, hot glue in place. 
  5. Cut small rectangle strips from another sheet of paper in the sampler pack, hot glue to the bottom of the sail, line with trim of choice. 
  6. Attach a piece of white paper wire to the top of the upward branch, and one end at the bottom right of the downward branch (the base). Cut triangle shapes from more paper and hot glue to the wire. 
  7. Stamp lettering onto the muslin fabric paper sheet and cut into tile shapes. Trace two tag shapes onto the same fabric, cut. Then add metal grommet, and stamped tile shapes to the tags, tie to the top left of the sail with bakery twine. 
  8. Create an anchor shape onto the front of the sail with more paper.
  9. Spray tattered angels ink of choice into a cheese cloth or cotton pad, spread all over the edges of the sail and any areas you want aged or distressed.
  10. Finally find a space in your home or studio for your driftwood masterpiece.
 Tips/Tricks

  • For a truly sturdy boat use clear caulk and caulk gun where the nails and branches are.
  • Try nautical ribbons instead of the muslin fabric ribbon.
  • Created various sails instead of one large one. 
  • Add more pieces of driftwood to form a larger boat, wider boat or make a row boat base.
  • Add German glitter and chipboard lettering.


Stay tuned for more driftwood projects this weekend. Smaller in size, fast and easy to make, perfect for table settings and memory projects.

xoxo
Lisa

Tuesday, March 31, 2015

DIY Vintage Transfer Pillows

For a few months I have been wanting to make DIY Vintage Transfer Pillows. I turned muslin fabric craft totes into vintage pillows w/ black/white copies, wax paper, heat and stuffing! Whole project cost $10 for 4 pillows!
This project can be done a variety of ways. Instead of wax paper, you can use stencils, stencil brush and black paint. Try a black and white photocopy, transfer paper, stylus and a black sharpie. Iron on transfer paper works as well.

Materials:

-Wax paper

-Printer paper

-Ink jet printer

-Image or lettering of choice

-Bone folder or painting scrapper

-Muslin fabric craft tote

-Pillow stuffing

-Paper spray adhesive of choice

-Tools: scissors, sewing needle, sewing thread, heat tool


Directions: 
  1. Choose a few images or lettering labels you want to print. (visit my flickr gallery for a bunch of free collage images) 
  2. Cut a few pieces of wax paper to 8.5 x 11 inch sheets. Attach the cut wax paper to the same size computer paper using spray adhesive. Load into your computer printer. Make sure the wax paper part is the area that gets printed on when it comes out of the printer. (Doing this makes printing the wax paper easier) 
  3. Before you begin printing, make sure you switch your printer settings to mirror images, so that the wording or images print in reverse. 
  4. Carefully remove the printed sheets from the printer, making sure to hold the ends, away from the ink, as the ink stays very wet. 
  5. Place the wet side of the wax paper onto one side of the muslin fabric craft tote, then using a bone folder or painting scraper, press/rub down onto the paper until the ink has transferred to the fabric. 
  6. Remove the paper and using a heat tool or blow dryer, add some heat to set.
    Cut the tote straps, fill with pillow stuffing and stitch close. 


    Iron on Paper Transfers:

  1. Replace the wax paper and printer paper with iron on transfer paper and print. (remember to click on the mirror settings on the computer before printing)
  2. Then iron onto the fabric, stuff, stitch.
For Transfer Paper and Sharpie:
  1. Print your image on regular printer paper. No need to mirror image.
  2. Place a piece of transfer paper onto the fabric and layer the printed image onto it, with printed side facing you (Blank side down against the transfer paper).
  3. Trace the image onto the fabric using a stylus or pencil. Remove both papers.
  4. Fill in the transfer with a black paint pen or sharpie. 

    Stencil and Paint Transfers:
  1. Buy paint stencil online or at craft store.
  2. Using a stencil brush and black fabric paint, stencil on the fabric.

Tips/Tricks:
-Try color images
-Photocopy ticket stubs such as a first movie date, wedding table number, broadway or sport tickets for a fun memory pillow.
-Create fabric banners, or print on wood.
Hope you enjoyed the tutorial, so many possibilities, Love to see what you make. I have my pillows on the couch and sitting chairs.  I've even used them to showcase my jewelry wares. Now onto the next crafting adventure.

xoxo
Lisa


Friday, March 27, 2015

Exploring Creative Photography

Photographing products can be a tough task.  Too basic of a color, too busy of a background, poor lighting conditions and shaky hands can produce less then stellar product photographs.  Most designers put careful time in creating a piece and are excited to share its completion. Your photographs of it need to be just as creative as the piece and showcase your design style.
A clever way to showcase your jewelry designs and brand message.
Here I created a heart from my jewelry designs and filled it with
photos that paint my story. Explore, Create, and Live Free Spirited. 

Choosing the right colors and themes can be overwhelming.  If you create fun and flirty jewelry, your backgrounds need to reflect that mood in order to compliment your piece.  With the rise of social media, designers of every degree are utilizing the benefits of social platforms to promote their product and create a brand awareness.

Instagram is a great visual platform for capturing everything we do in the current minute. Clogging your IG feed with more then 3 or 4 pictures of the same thing at the same time can be shunned upon by fellow Instagramers, who crave varied inspiration to retain their commit to follow.  Its very important to choose "the perfect picture" to capture your message to your audience.

Blogging, Facebook, Pinterest, Twitter, You Tube, Vine, Flickr, and Websites are some of the larger social media platforms designers are using to get their brand across.  Smart phones are replacing the everyday camera at a fast pace. Why, you might ask? Because you can instantly download to one of these sites and share that current moment.
Pay attention to the details you want to showcase. This dress
screamed vintage prom and the focal point was the fabric and
the center details. One photo was enough to portray that point.

Thinking out of the box is essential. Having great photo enhancing apps is key. Mix these two together and any photograph can be creative and eye catching.  I have been an Apple Iphone lover since the beginning.  I currently use it to take most of my pictures for social media.  After I select the set I want to share, I load them to my fave social media sites and tweak. Then I caption and upload to social media.

I play with colors, textures, props and lighting to get the look I want.  Frames, chalkboard prints, scrapbook paper, and signs play big roles in my product photography sessions.  If the lighting seems dull, I load the photos into editing apps and correct them.

Details, I love up-close details, they are in themselves a work of art when photographed. Details almost always get pinned to my inspiration board in the studio.  Scraps of fabric, trims, and broken jewelry.  Snippets of ephemera, tags and event badges.  Photographs of vintage things, and magazine cutouts line my inspiration boards.  I layer them with the things that inspire me.  I think inspiration boards and detail photos are always a must.

The Selfie! I've been doing the selfie for decades.
Here's a selfie I recently took at my best friends
bridesmaid dress gala. This headband is so me.

Some of my recommendations:

  • -Chalkboard or rustic black backgrounds for leather, distressed, metal, and industrial vintage pieces. Try chalkboards, chalkboard paper or spray paint foam board with chalkboard paint. (I will post my homemade chalkboard paint recipe next week). 
    A chalkboard rustic background to showcase my authentic
    baseball necklaces
  • -Try paper bags, parchment paper, old sheet music, wicker baskets, maps, metal signs, books, globes and wood for additional rustic backgrounds. 
    Earrings I made for a friend, layered onto a
    piece of scrapbook paper from My Minds Eye.
  • -Kitschy wrapping paper, wall paper, scrapbook paper, or fabric for sweet, sugary products, baked goods and dolls.
  • -Furniture, trunks, dress forms and candle bases work wonders for height and dimension.
  • -Take photos from the bottom up, angled or upside down for some creative fun. 
  • -Look for eye catching reflections in glass windows or elements.
  • Don't forget the selfie, sometimes its all about the selfie.
  • -Outside props work fabulous. Think rustic barns, house siding, trees, benches, pools, lakes.
  • -The beach. Gotta love the photographic properties that the beach has to offer. Sun, sand, shells and  water. 
  • Inspiration boards! Make an inspiration board of the things that inspire you and inspire your brand. Add to it or take away from it the further along you go on your journey. 
  • Never steal someone's background or imagery for your own work.  Remember copyright is essential. Always respect other designers works. 
    Layering a piece onto a photo greeting card.  I used a greeting
    card and necklace I received for Valentine's day, photographed
    them together. Worked like a charm. Card from Taylor Swift,
    Necklace-Francesca's Boutique.
Next week I will post some creative backgrounds and paint recipes for you to use and create.

xo
Lisa

Thursday, March 26, 2015

A Day at Simplicity


With building the new blog format (not yet released), the website and creative work, I have neglected blogging for over a month, after returning from VK Live. During this time so much has happened and lots to share.  I'll start with a recap of my day in NYC at Simplicity and the girls.

After getting our schedules together, I ventured into the city to see my friend Michele at Simplicity Creative Group, along with a friendly lunch with Michele Muska, Laura Kelly and Laura Neiman at Pera. You couldn't ask for a better group of girls to spend the day with. Being creative, fun and exciting.
 
Traveling to the city is just a train ride away for me and one I enjoy.  I always grab my coffee and start walking to my destination, first off Simplicity Creative Group.  Okay, I have to say, I just love it here.  I'm always excited here.  The ribbon room is like eye candy for the soul. I mean how do you choose your favorite ribbon, or trims, you just can't.
 

Exploring through the sewing department and seeing everyone hard at work to bring you the latest simplicity patterns and products is exciting.  Vintage dress forms still in use, fabrics draping down off tables, glimpses inside Ek Success Brands and chatting with creative types adds to your time there.  I love the staff and their creativity.

Before we left, the four of us exchanged gifties, hugs and love, then we were all off to enjoy a wonderful lunch at Pera.  Can you say fabulous? The food at Pera is divine, Mediterranean cuisine at its finest.


Relaxing with Michele and the girls was incredible, a complete pick me up for the month.  We all left happy, inspired and shall I say, full? lol.  I returned home with a bag of goodies and a fabulous memory with good friends.  Can't wait to see my girls again.

This bowl was a gift for my new dog "BO" from Laura Kelly, created in her signature style, along with personal heart ornaments for my momma and me, plus a stash of her buttons. The trims below are from Simplicity. These will grace some projects soon.

I will keep blogging here for all adventures and creative fun. The new blog on word press will have mostly projects and creative ideas.  It should be ready first week of April, I will keep you all posted.
Till then happy crafting!

xoxo
Lisa

Tuesday, February 03, 2015

VK Live 2015 Recap, Part 2

Welcome to my second recap post of the VK Live Show held Jan.16-18, 2015 at the Marriot Marquis in NYC. This show is a yarn enthusiasts dream, a mecca for yarn style and creative bliss.

The second day at the show was incredible. We weren't at the booth more then a few minutes before shoppers combed the DMC Threads booth looking for their favorite products and looking first hand at the gorgeous yarns that lined the shelves. From Natura Yarns and Woolly Yarns, all the colors are gorgeous, natural and happy.  The use of these yarns are endless. Again, the quality of the yarns are incredible just like DMC's threads.

My post before covers the difference in the yarns, but I will recap that again for any first time viewers. DMC Woolly Natural Knitting Merino wool is wonderfully soft. Its unique quality comes from long, thin fibers that give superior softness to touch and a feeling of comfort when against the skin. Sourced from Australia, it is 100% natural and renewable. Woolly yarn weight is "Light" size 3, making it ideal for all seasons. Fabrics knitted with Woolly have a fine even appearance with a nice drape and crisply defined stitches. Knitting with multiple strands produces a bulkier fabric. Using multiple colors creates interesting blends.  Available in 48 beautiful colors.


DMC Natura Just Cotton is a beautiful matte knitting and crochet yarn made with 100% combed cotton. Natura Just Cotton produces a soft-to-touch, drape-able fabric with good stitch definition. The weight is fine size 2.  The extensive range of colors is designed to blend together. Natura Just Cotton is appropriate for infant, children, adult, and home decor projects. Available in 60 colors.


Top This was a show favorite among our shoppers and DMC loyalist.  Elephants, giraffes, owls and monkeys are just some of the stuffed animals that live large on top of the finished knitted hat.  The continuous textures make it simple to knit and an ideal project experienced knitters can use to teach beginners because they never need to change yarn. FREE knitting hat pattern included with each ball. Just pick your favorite animal and knit.


On Saturday at 11:15am attendees come experience the DMC fashion show, getting a first view of the beautiful clothing and accessories created with DMC patterns and yarns.  Watching models wearing them live on the show runway was so exciting. I couldn't wait till the show was over so I could try some on and experience wearing the glamour that the models did.

With a rush to the booth after the show, the DMC crew worked hard to answer questions, assist customers and help with the products.  All the attendees were fabulous, such a pleasure meeting so many new people and preparing for new adventures.

Later that evening, a few of us attended the Saturday night gala.  One word to describe the gala, Incredible. From the speakers, to fellow gala goers, the food and the swag bags, everything was Incredible.  I left feeling inspired and re-charged, ready to begin creating something fabulous.

The whole weekend at the show was once again, Incredible.  Lots of excitement and inspiration. Good energy, synergy and new friends.  Incredible products, projects and patterns.  Leaving is always tough, always wishing for another day of the show to exist.  But alas, VK Live will be back in NYC next year and we will be waiting to go.

For more info on new products from the DMC line of yarns.  To shop for DMC products including the yarns, patterns, kits and handmade items visit: ShopDMC.com

xoxo
Lisa