Showing posts with label Scrapbook Paper. Show all posts

Wednesday, August 19, 2015

Midsummer Fun, Exploration and Fairy Specimens!

Its late August and that can only mean one thing, Midsummer Season. You probably thought I was going to say Back to School, didn't have the heart to blurt it out. In NJ students go back to school after Labor Day which is September 7th this year.

Midsummer is such a magical time of year, sunflowers glowing in the warm light, fireflies flickering in the night, last minute vacations and explorations. There is just so much to do this time of year.

After a month's break from heavy creating, I found my creative muse and started making a ton of projects from jewelry to paper craft and everything in between. I have a huge parcel from the Canvas Corp Brand of families that I just couldn't wait to dig into. Everything in their brand speaks to me.

I have started a series of exploration projects reflecting on the 1920's Egyptology era, African adventures, specimens and wizard-ology.  Some seaside whimsy and storybook tales mixed in there some where. 

The first series of projects are the fairy specimens, The first one is labeled "FAE" no.1, she is a Fairy Queen discovered off the coast of South Africa by a Museum Archaeologist named Brady Winthrop who discovered an old map and legend in the museum's private library chamber. Professor Winthrop along with Blake Davis, Cooper Vanderhoff and Casey Mellon sailed off on an exploration to prove fairies do exist.  What they found was more then just fairies.......

The first in the series of 12 specimens is "FAE" no.1, who has been named Ciara and  carefully placed in a specimen box with branch samples from the site. Legend has it that these specimens are actually mummy casings which cannot be opened until the Fairy Life Rites Spell is said. This secret spell can be found in the Ancient Book of Fairy Rites and must be read on a blue moon....

For now I'd like to share the first series of specimens, "FAE" no.1-Ciara.

Materials:
  • Clear 3 by 5 inch Plastic Hinged Box (craft and dollar stores have these)
  • Serengetti 6 by 6 inch Paper Pack-7 Gypsies
  • Maritime Mini Ephemera Pack-7 Gypsies
  • Printer Tray Label Holders-7 Gypsies
  • Pearl Glimmer Mist Spray-Tattered Angels
  • Tattered Leather Glimmer Mist-Tattered Angels
  • Flat Back Frozen Charlotte-Lisa Kettell Designs
  • Rhinestone Strand-Simplicity 
  • Glues/Tools: Hot Glue, Hot Glue Gun, Glue Stick, Scissors
  • Other: Copper Tape, Thin Branches, Beige Lacy Floral Leaves, Glitter, Stamped Lettering
Directions:
  1. Line the bottom of the plastic box with two types of paper from the Serengetti paper pack using a glue stick.
  2. Hot glue thin branches to the right side of the base and side of the plastic box.
  3. Age the frozen charlotte with walnut inks, rubbing off excess with a soft cloth or napkin until desired amount of aging is achieved.
  4. Cut the leaves to form whispy wings, age with more walnut ink and hot glue to back of the frozen charlotte. 
  5. Next hot glue the winged frozen charlotte to the box center. Spray the whole box contents with mist spray a  few times. Embellish the frozen charlotte with copper tape and rhinestones.
  6. Attach the plate to outside of the front rim of the box and add lettering.
  7. Finally add any extra pieces to the box.


Tips/Tricks:
  • The frozen charlottes I use are from my line of products and are perfect for painting, aging w/inks and gluing in paper projects and assemblages.
  • For a realistic porcelain frozen charlotte coat these frozen charlottes from my line with resin glaze or spray glaze.
  • I used the wrappings from ground cherries as my wings. But you could cut open floral chinese lantern flower pods or use bark shards or shells.
  • Try vintage images in place of the frozen charlotte.
  • Make a faux map and add a metal tag for more fun. 
Stay tuned for the rest of the exploration projects including more specimens, the book of Fairy Rites, Professor Winthrop's Journals, Casey's Treasures and more.

Monday, April 06, 2015

Patriotic Splash, Paper Cone Tutorial

"The American Flag is a symbol of our freedom, national pride and history" -Mike Fitzpatrick


"Patriotic Splash" is a paper project inspired by the seashore, vintage Boardwalk, and primitive summer patriotic holidays! This huge paper cone was made the w/sails and shells sampler pack from Canvas Corp., paper straws, wood accents, vintage ephemera and stained ribbon using Tattered Angels.

I recently came across a box of vintage ephemera containing old patriotic costumes, bathing beauty scenes, and seaside amusement. All ornate, detailed and some had color. Blues, whites, tans and creamy reds. Everyone of them screamed old boardwalk, old patriotic Americana with Memorial Day, Fourth of July and Labor Day scenes by the seashore. So inspiring and fun. The result was this project and a few others I will post soon, think bathing beauties and flags.
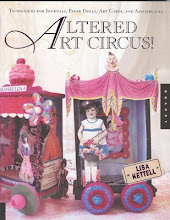
To make your own paper cone you could photocopy the template out of my mixed media art book: "Altered Art Circus", Quarry Books, Lisa Kettell. If that''s not available to you, here is the full set of instructions to make a paper cone and this project.

Materials:

Directions:

  1. Starting from one corner, roll a 12 by 12 inch piece of scrapbook paper into a cone shape. Hot glue in place and cut any excess paper. Fill with light blue paper shreds, set aside.
  2. Hot glue a 12 inch piece of white paper floral wire to each end of the paper cone, arching it around the front. Cut various square shape images from the scrapbook paper, and hot glue to the white paper floral wire to form a banner.
  3. Attach a crescent moon shape to a paper straw to make a wand, set aside.
  4. Begin dying white or light color cotton ribbon with fine wood spray ink. Spray until desired ink color is achieved, let dry. Then tie to the crescent moon wand and insert into the paper cone, hot glue in place. 
  5. Cut a 2 inch by 12 inch strip of seer sucker scrapbook paper from the scrapbook paper pack. Begin cutting fringe into the cut paper strip, when complete, hot glue to the paper cone rim.
  6. Layer your cone with more images cut from the scrapbook paper, vintage image and ephemera.
  7. Make a paper fan rosette from the scrapbook paper, add that to the paper cone.
  8. Finally embellish with German glass glitter and a wire to hang your paper cone. 

  9. Tips/Tricks:
  • You can make smaller sized paper cones, paper cone wreaths, paper cone banners.
  • Turn your cone into a seaside party hat or large table center piece.
  • Add shells and more ephemera to your paper cone.
  • Distress your paper with more inks. 


    I hope you enjoyed this project and get inspired to make your own version.


    Happy Monday,

    Lisa xoxo

Thursday, April 02, 2015

Come Sail Away, DIY Large Driftwood Boat


"Come Sail Away" with me on a seaside adventure. This project is for a large 3 foot driftwood schooner boat made w/products from Canvas Corp Sails & Shells line, 7Gypsies trinkets, ink from Tattered Angels, shells and driftwood I found last week near my house. This boat is now sitting proudly in my loft space!
The benefits of living in NJ, means quick access to many lakes, and the shoreline. Some rivers such as the Raritan river stream to the bay, which extends into the Atlantic ocean at the Perth Amboy points of the state. Whenever I get the chance, I head over to Duke Island Park to explore and look for natures gifts and washed up treasures such as sea/river glass, tile shards, coins, shells and drift wood, which stream up line from the bay and wash up onto the land edges.


After a storm or high water, is the best time to explore, as new treasures surface. I never know what I will find on my exploration. This always leads to inspiration and a bevy of project ideas such as this project. After receiving a fabulous package of paper and goodies from Canvas Corp., line of products, I new my found objects would become a form of art.

I stumbled onto several pieces of driftwood, and new they were destined to become a large boat assemblage, the result this project; "Come Sail Away".
 Materials
  • 2 large pieces of driftwood or thick tree branches
  • Scrapbook paper, Sails & Shells Sampler Pack, Canvas Corp 
  • Findings, clothes pins, 7 Gypsies
  • White paper floral wire, seer sucker bakery twine (Hemptique), trims and muslin fabric ribbon
  • Shells, tiny starfish 
  • Parchment color treat box, vintage sailor ephemera
  • Inks from Tattered Angels (fine wood, aged mahogany)
  • Tools; scissors, hole punch, thin nails, hammer, hot glue and hot glue gun
  • Extras/Optional: German glitter, small branches, tags, metal grommets, grommet setter, ink pad and number/letter stamps, cotton pad or cheese cloth for inking

Directions
  1. Decide which piece of driftwood will be the base and which one will go on top.  Then hammer thin nails into the two pieces of driftwood to hold in place. I used 3 nails. Hot glue any openings for extra durability.
  2. Crinkle a piece of parchment earthy color paper from the scrapbook sampler pack, punch two holes into one side of the paper. (one hole at the top, one hole at the bottom).
  3. Cut 2 pieces from fabric ribbon measuring 12 inches each. Thread through each punched hole and tie onto the upward piece of driftwood.  
  4. Hot glue a treat box to the middle of the upward piece of driftwood. Insert a small branch into it, decorate with tiny shell, vintage sailor image and wording from the paper sampler pack. Again, hot glue in place. 
  5. Cut small rectangle strips from another sheet of paper in the sampler pack, hot glue to the bottom of the sail, line with trim of choice. 
  6. Attach a piece of white paper wire to the top of the upward branch, and one end at the bottom right of the downward branch (the base). Cut triangle shapes from more paper and hot glue to the wire. 
  7. Stamp lettering onto the muslin fabric paper sheet and cut into tile shapes. Trace two tag shapes onto the same fabric, cut. Then add metal grommet, and stamped tile shapes to the tags, tie to the top left of the sail with bakery twine. 
  8. Create an anchor shape onto the front of the sail with more paper.
  9. Spray tattered angels ink of choice into a cheese cloth or cotton pad, spread all over the edges of the sail and any areas you want aged or distressed.
  10. Finally find a space in your home or studio for your driftwood masterpiece.
 Tips/Tricks

  • For a truly sturdy boat use clear caulk and caulk gun where the nails and branches are.
  • Try nautical ribbons instead of the muslin fabric ribbon.
  • Created various sails instead of one large one. 
  • Add more pieces of driftwood to form a larger boat, wider boat or make a row boat base.
  • Add German glitter and chipboard lettering.


Stay tuned for more driftwood projects this weekend. Smaller in size, fast and easy to make, perfect for table settings and memory projects.

xoxo
Lisa

Thursday, March 20, 2014

Mounted Toy Plaques


Come One, Come All to the Spring Circus Toy Ball....

Its the first day of Spring.  What does that mean? Nature waking up, longer days of sunlight, flowers sprouting, trees glistening and birds chirping. Spring is a time to clear out the old and ring in the new. Its this time of year that we plan for the warm days of summer.

Spring is also the start of circus and carnival season which lasts till the end of November.  The calliope music, the kettle corn, candy apples and the big top. Ornate performers, glowing amusements and boardwalk adventures are all waiting for us this coming months.

As a lover of circus themes and the author behind: "Altered Art Circus", Quarry Books, Lisa Kettell, I am preparing for a new season of adventure.  To kick off the season I have created some new projects to share with you.  One of the projects is called: "Mounted Toy Plaques"and was inspired by a project in my book, "Altered Art Circus".  Which involved recycling discarded plastic animal toys.

For this piece I recycled a small plastic animal toy, mounted it on scrapbook covered wood craft circle, and embellished.  Its really simple to do and I will tell you how.

Materials:
  • Small plastic toy animals
  • Medium sized wood craft circle
  • Medium sized scrapbook embellishment frame
  • Scrapbook paper
  • Crepe paper
  • Glitter
  • Glues: hot glue, craft glue
  • Tools: hot glue gun, hot heat tool, scissors
  • ( I used the hot marks tool kit w/ hot knife point by Walnut Hollow) 

Directions:

  1. Layer the medium sized wood craft circle with scrapbook paper, secure in place with craft glue.
  2. Line the medium sized scrapbook embellishment frame onto the scrapbook lined wood craft circle.
  3. Using the hot knife point with the hot tool, cut the plastic animal toy in half. Then hot glue to the center of the wood craft circle.
  4. Decorate the mounted plastic animal with crepe paper, a paper hat, glitter and trims.

Tips/Tricks:

  1. Use a piece of chipboard or cut a circle from a discard piece of cardboard or box.
  2. Use scrapbook borders or trim such as pom pom in place of the frame.
  3. Add tags, and additional embellishments to the piece.
  4. Create several, connect with ribbon for a banner or small swag.
  5. Make larger mounted plaques using larger plastic toy animals mounted on larger backgrounds such as round frames and book covers.
  6. Instead of plastic animals, make one out of clay or layer an image.
  7. All discarded plastic toys or doll heads will work as well.


To purchase small plastic toys for $3.95 for a bundle visit my artfire store:
http://www.artfire.com/ext/shop/studio/MoonfairesWorld 

If they sell out, email me at lisakettell@yahoo.com for a reserved listing.
xoxo
Lisa


Monday, May 07, 2012


Design Team Project
By: Amy Mayfield

Let’s get crafty and go to the circus with a spoonful of stars–we can skip the $15 balloons.

Hey y’all! Today I’m tickled to show you a wood plaque turned into a marvelous circus as a project for the Lisa Kettell Designs Design Team. Get crafty, grab a spoonful of stars and let’s go to a circus where there’s no crying children or $15 balloons.

Supplies Used:
 
Unfinished Wood Plaque
Three Sheets of Scrapbook Paper from Lisa Kettell Designs
Lisa Kettell Fairy Follies CD

Lisa Kettell Sweet Shoppe Carnival Embellishment
 (unpainted)
Bakers Twine
Fiskars Banner Punch

Pink Pom Pom Fringe
A Ticket
Scrapbook Paper: Music
Scrapbook Paper: Dictionary
Stickles in Diamond
Glitter or Glitter Paper
Tiny Star Sequins


Directions:

The first thing I did was to cut a piece of Lisa’s scrapbook paper to use as the background. I cut a crown from another sheet of Lisa paper and painted the Sweet Shoppe Carnival. Sadly, while I can paint many things a straight-ish line is not one of them. Ditto for cutting a straight line; paper trimmers are my friend.
I glued a piece of glitter paper to the back of the carnival after using a knife to cut out the “door” area, I wanted it to open to something full of sparkles. I glued music down the side, glued in the crown and glued down the carnival. I chose the word brilliant from a page of dictionary scrapbook paper, pinked the edges and glued it along the top. The fairy came from Fairytale Follies CD. I carefully cut her out and used adhesive foam to give her a little dimension and then traced her with the Diamond Stickles.

She has silver stars dripping from her hands; they were attached via glue stick and given a little extra sparkle with the Diamond Stickles. Using my hot glue gun, I bordered the box with the pink pom poms and added the ticket. Using my banner punch, I cut out 5 pieces from another sheet of Lisa’s and attached it to the bakers twine with my glue gun. A dot in each corner holds the banner in place and allows it to hang freely. Because I don’t think you can EVER have too many sparkles, I traced each banner piece in the Diamond Stickles.
I recently read “The Night Circus” and between that and Lisa’s magical creations, found myself very inspired. If you haven’t read the book, pick it up! Also, Lisa has added some NEW collage CDs to her Artfire store and has some very affordable options. I picked up the Halloween one and am eyeing the Circus one and the Vintage Storybook and Ephemera Disc.

____________________________________________________________________________________
How amazing is this project that Amy did?, could have come straight out of a circus, I love love love it, Now to make one of my own, hmmmmmm, perhaps an elephant circus one!

xoxo
Lisa!

Saturday, February 18, 2012

Below is a list of my top 25 favorite products and manufacturers at this years Winter CHA 2012 show in Anaheim, CA.
CHA Day 3: Graphic 45! 19
1.Ruby Rock-It www.rubyrock-it.com
2.Graphic 45 www.g45papers.com
3.Hemptique www.hemptique.net
4.Vintaj www.vintaj.com
5.Beacon Adhesives www.beaconadhesives.com
6.Scrap Perfect www.scraperfect.com
7.Plaid www.plaidonline.com
8.Ranger www.rangerink.com
9.Ellison/Sizzix www.ellison.com
10.Colorbox/Clearsnap/Donna Salazar www.clearsnapinc.com
11.Basic Grey www.basicgrey.com
12.Kaiser Craft www.kaisercraft.net
13.EK Success:Martha Stewart and French General www.eksuccessbrands.com
14.Glitter Dust www.thermoweb.com
15.October Afternoon www.octoberafternoon.com
16.Offray Ribbon-Sports Line
17.Best Creations www.bestcreation.us
18.Zutter www.zutterproducts.com
19.Walter Kunze Dresden's www.walterkunze.com
20.Globe Craft Memories www.globecraftmemories.com

Today I am showcasing No.2: Graphic 45, I have been a fan of Graphic 45 papers for awhile, every year I wait to see what they come up with next, and I am never disappointed, they always produce a creative line. At CHA, if you are trying to locate them, just look for their famous clock tower that sits at the top of their edgy, fun booth, always lined w/pottery barn vintage style black shelving which are brimming with the latest projects and decor using their beautiful papers.

This year was no exception with another series of fabulous papers which have eye candy written all over it. Take a look at inside their booth and their new series of papers:
CHA Day 3: Graphic 45!CHA Day 3: Graphic 45! 12CHA Day 3: Graphic 45! 16CHA Day 3: Graphic 45! 17CHA Day 3: Graphic 45! 15CHA Day 3: Graphic 45! 24Love this collection:CHA Day 3: Graphic 45! 25CHA Day 3: Graphic 45! 23CHA Day 3: Graphic 45! 15Too Cute or what?CHA Day 3: Graphic 45! 13CHA Day 3: Graphic 45! 8CHA Day 3: Graphic 45! 14CHA Day 3: Graphic 45! 11CHA Day 3: Graphic 45! 10I so love this frame, isn't it adorable?CHA Day 3: Graphic 45! 9CHA Day 3: Graphic 45! 20Several years back I wrote and illustrated a children's story called: "Snuffy and the Flying Pig", a cute little story about a flying pig named Snuffy and his friends, when I saw this line I nearly melted!CHA Day 3: Graphic 45! 22Now who do you know that loves dolls? Any hints....LOL, I'd say me! LOL:CHA Day 3: Graphic 45! 6CHA Day 3: Graphic 45! 5I want this doll too...CHA Day 3: Graphic 45! 7It was like walking through stages of time inside their booth and the girls were super nice as always, look at their fabulous outfits so 1920's vintage:CHA Day 3: Graphic 45! 3CHA Day 3: Graphic 45! 4I hope you enjoyed your journey and the new products from the amazing Graphic 45, another must have for 2012!

Magic and Joy,
Lisa!