Monday, March 24, 2014

Deer Queen Tassel Necklace


Tassel jewelry is quite the trend these days. Starting last year they made a come back in fashion. This year they are setting an even bigger trend. With top fashion chains incorporating more handmade couture and animal themes, I'm excited to start doing the same. Last night I decided to create a tassel necklace using a discarded necklace, charms, rhinestones and a tassel. But the tassel was creamy white. No need to fear with a mix of pearl grey and left over aquamarine Rit Dye I had, the tassel would be dyed and a necklace would be made.

Here is the material list and directions so that you can create your own hand dyed tassel necklace.
To view my original post visit Rit Dye at: www.ritstudio.com

Materials:
For Dyeing The Tassel: 
  • Liquid Rit Dye: Aquamarine, Pearl Grey
  • White tassel
  • Measuring cup
  • Measuring spoons
  • 2 medium sized bowls (for dying and rinsing),
  • Paper towels
  • Plastic table cover
  • Rubber gloves
  • Tongs
  • Foil pan
  • Plastic spoon

For the Jewelry Making:
  • Jewelry chain
  • Deer pendant
  • Crown charm
  • Jump rings
  • Needle nose plier
  • 2 part epoxy glue

Directions:
Directions To Dye The Tassels:
  1. Prep your surface. Lay plastic table cover on the surface you will working over. Put on your rubber or latex gloves.
  2. Mix 2 tablespoons Rit liquid dye in pearl grey and 1/2 tablespoon aquamarine with 1 1/2 cups hot water in a plastic, or metal bowl and stir. Let steep for 20 minutes. For good hot water, heat some in the microwave in a glass bowl for 2 minutes.
  3. Place tassel in the greyish green tinted dye solution, let set for 5 minutes stirring occasionally. Remove the dyed tassel when desired color is achieved and place onto a foil pan. Let dry. Reserve your remaining mixture for more dying by pouring into a glass jar or container, keep sealed.
 Directions To make Necklace:
  1. Prepare 2 part epoxy according to package directions. Coat the back of the deer pendant or pendant of choice with the epoxy and attach to the top of the dyed tassel. Let set for a few minutes.
  2. With a needle nose plier open a jump ring by slowing twisting one end away from you. Insert into the opening of the deer pendant, attach to the center of the jewelry chain. Close the jump ring.
  3. Cut a strip of rhinestone attach to the tassel just under the bottom of the pendant with more epoxy glue. Layer with a crown charm using more epoxy glue or a jump ring.
 Tips/Tricks: 
  • Try layering 3 tassels for a fuller necklace.
  • Mix and match Rit Dyes for more color possibilities.
  • Dip the end of the tassel into more dye for an ombre look. 
  • Use a store bought necklace that already has a pendant attached, add the tassel and additional findings.
Hope you enjoyed the project. For more of my projects using Rit Dye, visit www.ritstudio.com 

xoxo
Lisa
 

Thursday, March 20, 2014

Mounted Toy Plaques


Come One, Come All to the Spring Circus Toy Ball....

Its the first day of Spring.  What does that mean? Nature waking up, longer days of sunlight, flowers sprouting, trees glistening and birds chirping. Spring is a time to clear out the old and ring in the new. Its this time of year that we plan for the warm days of summer.

Spring is also the start of circus and carnival season which lasts till the end of November.  The calliope music, the kettle corn, candy apples and the big top. Ornate performers, glowing amusements and boardwalk adventures are all waiting for us this coming months.

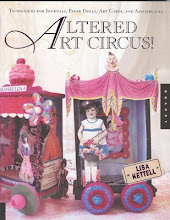
As a lover of circus themes and the author behind: "Altered Art Circus", Quarry Books, Lisa Kettell, I am preparing for a new season of adventure.  To kick off the season I have created some new projects to share with you.  One of the projects is called: "Mounted Toy Plaques"and was inspired by a project in my book, "Altered Art Circus".  Which involved recycling discarded plastic animal toys.

For this piece I recycled a small plastic animal toy, mounted it on scrapbook covered wood craft circle, and embellished.  Its really simple to do and I will tell you how.

Materials:
  • Small plastic toy animals
  • Medium sized wood craft circle
  • Medium sized scrapbook embellishment frame
  • Scrapbook paper
  • Crepe paper
  • Glitter
  • Glues: hot glue, craft glue
  • Tools: hot glue gun, hot heat tool, scissors
  • ( I used the hot marks tool kit w/ hot knife point by Walnut Hollow) 

Directions:

  1. Layer the medium sized wood craft circle with scrapbook paper, secure in place with craft glue.
  2. Line the medium sized scrapbook embellishment frame onto the scrapbook lined wood craft circle.
  3. Using the hot knife point with the hot tool, cut the plastic animal toy in half. Then hot glue to the center of the wood craft circle.
  4. Decorate the mounted plastic animal with crepe paper, a paper hat, glitter and trims.

Tips/Tricks:

  1. Use a piece of chipboard or cut a circle from a discard piece of cardboard or box.
  2. Use scrapbook borders or trim such as pom pom in place of the frame.
  3. Add tags, and additional embellishments to the piece.
  4. Create several, connect with ribbon for a banner or small swag.
  5. Make larger mounted plaques using larger plastic toy animals mounted on larger backgrounds such as round frames and book covers.
  6. Instead of plastic animals, make one out of clay or layer an image.
  7. All discarded plastic toys or doll heads will work as well.


To purchase small plastic toys for $3.95 for a bundle visit my artfire store:
http://www.artfire.com/ext/shop/studio/MoonfairesWorld 

If they sell out, email me at lisakettell@yahoo.com for a reserved listing.
xoxo
Lisa


Wednesday, March 19, 2014

Lisa Kettell Designs Artist Spotlight: Cathy Candolfi


As soon as I laid eyes on one of Cathy's pictures, I was smitten. Cathy has been a valued customer of Lisa Kettell Designs products. Recently Cathy shared with me some of the artwork she created using some of the embellishments in the Lisa Kettell Designs line of embellishments.


All I can say is WOW, I love what she has done to the embellishments. If you wanted to escape to a circus-y world then these pieces will definitely transport you there. Every character from the circus world has made an appearance. The Strong Man, the Lion Tamer, they are all here ready to put on a show.

Cathy's creative spirit and magic have inspired me to get back to creating with more color. To re-visit the world I lived in during the making of my book Altered Art Circus. It was a world of magic, mystery and intrigue. It captivated children and adults alike, bringing our imagination to life.


I hope Cathy's works and use of our products will spark the creativity in you and help you create your own magic filled world.

To visit more of Cathy's projects and works visit these sites:
www.fatabislacca.com
www.fatabislacca.ch
http://www.flickr.com/photos/27785912@N07/

To purchase Lisa Kettell Designs products visit:
http://www.artfire.com/ext/shop/studio/MoonfairesWorld

and soon at:
www.lisakettelldesigns.com
xoxo
Lisa

Monday, March 17, 2014

Top Secret Blog Hop


Hi All,

I'm so excited to be taking part in the Top Secret Blog Hop hosted by Laura Kelly.  In this special blog hop extravaganza Laura asked designers to create in a specific color straight from the rainbow.  Can you guess which color I am?  Here's a hint: my color is traditionally regarded as a color on the visible spectrum, as well as one of the seven colors of the rainbow: the color between blue and violet.....Can you guess my color now?  I am Indigo.

The first recorded use of indigo as a color name in the English language was in the year 1289. There is something so magical about the color of indigo which has a mix of blues and violets embracing it. Indigo is a color which has many facades.  It can be romantic, mysterious, and mystical.  It can call on fairies, goths and bohemians.  Its vintage and modern all wrapped in one.

For the Top Secret Blog Hop all bloggers received a secret parcel filled with all items showcasing our color. My package contained: thread, floss, paint, paint marker, ice sprinkles and a jean pocket scrap. The challenge was to create something in your assigned color using some of the products in the parcel. After a few days of thinking I decided to up-cycle a discarded hard cover library book.  It contained an old mystery story.
 Materials:

-Jean/Denim pocket and scraps
-Discarded hard cover book, journal or drawing pad
-Ribbon
-Large metal safety pins, Michaels Crafts Line
-Adhesive page flags, Michaels Crafts Line
-Paper stickers, Flora and Fauna, Brenda Walton for K & Company
-Acrylic paint, ink spot color, Folk Art Paint
-Glues: hot glue, sturdy craft glue
-Tools: scissors, hot glue gun
-Other: metal tags, metal flowers, tiny metal cabochons, rhinestone bow, rhinestone pieces, jewelry findings

 
Directions:

1. Using the jean pocket scrap I covered my book's front cover and spine. hot glued in place.  It fit perfectly around the front. I then folded the uneven edges over the cover and onto the other side.

2. For the back cover I added left over jean scraps from my scrap bag and hot glued in place. I layered a cut piece of muslin fabric to the inside covers to finish it off.

3.  Now add decorative page tabs to the inside pages.

4. Tie a large ribbon around the center of the book, attach metal number tags to the ends.  These are the book marks.

5.  Embellish the cover of the book with large metal safety pins, paper stickers, tiny metal cabochons, rhinestone bow, rhinestones and metal flowers.

6. Enhance the book pages with ink spot color paint, ephemera, images and your fave mementos.


Tips/Tricks:

-Cover a blank journal or drawing pad and carry on your travels. Fill it with your adventures.
-Dye your jean scraps for more color choices.
-If you don't have jeans cover your book with fabric and make your own pockets.


This project was also inspired by a recent trip to NYC w/Laura where she surprised me with tickets to see Matilda. A story by Roald Dahl which was brought to life on the big stage. Its a story about a little girl who won't stop anything until she makes her dreams come true. She fights the odds and in the end her strong desire to BELIEVE in all the good things in life brings her the happiness she always wanted. While never losing her spirit along the way.


The colors of the set were Indigo, blue, violet and other magical colors. It was an exciting adventure and inspired me to continue on my own journey. This journal I created represents, friendship, love, and the magic of life. It will be filled with mementos that I acquire along my journey in creating a wonderful life.

I hope you enjoyed this project and visit all the bloggers who have taken part in this artistic rainbow of friendship and design.

Here are their links:

www.laurakellydesigns.com/laurakellydesignsblog/rainbow-blog-hop-2014

a Rafflecopter giveaway xoxo
Lisa

Sunday, March 16, 2014

Spring Birds Canvas Project

Spring Birds Canvas Project by LK Designs DT Member Marfi Bradford

In Marfi's Words:
 
Yesterday I sat out in the tiny "backyard"of my gypsy wagon and
created a little project using some of
my awesome Lisa Kettell products.
It's simple and it's a little tribute
 to this beautiful season.
Supplies
6x6 canvas
paper mache bird box
hot glue gun/glue sticks
acrylic paints: black, navy blue, medium blue, dark pink, light pink, orange, peach
oil pastels:dark brown, green, light pink, fuchsia, peach
red lace trim
Directions
1. Paint canvas dark blue
add a bit of light blue for interest.
using the oil pastels, draw branches and flowers
2. Paint china doll head peach, add facial details and hair color
cut the top part of the bird off
paint dark pink, orange and light pink.

3. Hot glue china doll head to bird body
add lace trim
hot glue to the canvas
paint feet on with light pink paint.
4. There's a lot of different things that can be done
with this one...
she could be a raven for Halloween, or a dove for Easter
her body can be covered over in sheet music
or she can placed in a little cage...
there's endless possibilities1
I hope you try this out & have loads of fun.
Visit Lisa's blog and artfire shop 
for a happy inspired day:) 
 
For more fun projects, DT projects and creative magic, visit the amazing Marfi on her blog at:

Stay tuned for more Lisa Kettell DT Member Projects this week. Be on the look out first thing in the morning for the Secret Blog Post Event too.

xoxo
Lisa
Thursday, March 13, 2014

The New Website

Hi All,

I received a few emails and facebook inbox messages asking me what will I be posting next.  I have  4 posts scheduled starting this coming Sunday. This post will showcase the Secret Blog Hop hosted by Laura Kelly.

The next post will highlight the Matilda Show in NYC and the inspiration behind it, which inspired me in so many ways.  This will be followed up with a project post and the unveil of the new website Lisa Kettell Designs www.lisakettelldesigns.com
After 18 years of creating I have reached various artistic audiences and have widened my network. The result ever changing sites, and new partnerships.  The time has come for me to streamline all these sites into one location, a headquarters, a one stop site where your fave Lisa Blogs, Shops, Products, Partners/Affiliates, Design Team and Projects will stream from.
This blog, Faerie Enchantment will remain in its present location and linked to the parent website, Lisa Kettell Designs. During the past few weeks I have been active in streamlining these sites and linking it all together.
Over the next few weeks, I look forward to sharing with you new product, projects, and a great company whose product you will fall in love with.

Thanks so much for all these years of support and belief in Lisa Kettell Designs.  I look forward to sharing with you more creative inspiration and fun.

xoxo
Lisa