Showing posts with label fairy box. Show all posts

Friday, December 20, 2013

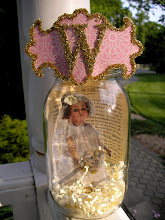
Yule Fairy Box by DT Member Wendy Aspinall


Today I am showcasing another design team project from our newest DT member Wendy Aspinall. Her Yule Fairy Box is fabulous and ready for you to make. Create your own version using some of the products from the Lisa Kettell Designs line found here: http://www.artfire.com/ext/shop/studio/MoonfairesWorld


Wendy's Yule Fairy Box

If you like to play too here's what  you'll need :

Materials:
  • Paper mache box ... any shape
  • Flora picks  I used a  glittered twig  and leaves 
  • Moss
  • Alcohol ink ( brown)
  • White tulle
  • Small snowflake  broken  to make wings
  • Small paper flowers
  • Tinsel
  • Silver glitter
  • Page from an old book 
  • Small piece of lace
  • Frozen Charlotte, Lisa Kettell Designs 
  • Fancy frou frou pearl pins, Lisa Kettell Designs 
  • Glitter stars, Lisa Kettell Designs
  • "Fairy" word taken from fairy follies CD, Lisa Kettell Designs


 Directions:
  1. Add the old book page to both the top and bottom of the box , glitter the side of box and lid.. put aside to dry.
  2. spray frozen Charlotte with alcohol ink .. let dry. 
  3. cut and fold the tulle in to ten layers , sow together  at the top with a running stitch... pull up to made a skirt  and add to the doll.   Using the lace  wrap around the top of the body, secure with dab of hot glue at the back.. add wings.
  4. Make hat with more book paper, secure with hot glue to head.  Add flower to skirt and to hat.
  5. Add some tinsel to the pearl pin  and bend wire around a paint brush  to curl it.
  6. Make a small hole in top of lid and glue in the twig pick. glue down moss , glue doll , wand , small leaf and flower , glitter stars. 
  7.  Lastly add the word, fairy to one of the stars. 

Tuesday, May 08, 2012

Design Team Project
 By Sherry Payne-Scott
 
Elfin Diorama Shadow Box
 
Materials
-Elfin parts, Lisa Kettell Designs  
-Recycled cake mix box
-Newspaper
-Decorative paper
-White birch bark
-Floral moss
-Tools: scissors, hot glue gun
-Glues: modge podge, hot glue


Directions
1.To create diorama start with a recycled cake mix box for your base.
2. Measure in a cut 1" in on both sides, folding the flaps in to make the inner depth. 
3. Decoupage the entire box with newspaper and modge podge.
4.Paint the shadow box black. cut decorative paper for the back side, hot glued it in place.


5. Take white birch bark tear it to size, place on the front edges and hot glue into place.
6. Attach loose moss, hot glue the bottom and bottom front pushed the moss into the glue (shake off any loose moss)
7. Then place 3 of LISA KETTELL'S Elfin heads and hot glued them into place.
8. Finally add a rock to make it look as if the Elves are peeking at you.


Princess Fish Media Mail Art
I cut an 8" fish shape out of chip board
I used LISA KETTEL'S pink swirl Cupie paper and tore little pieces to create the scales of the fish
I had an aqua paper and tore it into little pieces to add the blue for the fins
I decoupaged the pieces to create the scales and worked from tail to head
I cut the crown out of the paper, decoupaged it to a second layer to add structure to the crown , then attached the crown with decoupage glue
I attached a 1/2" google eye with hot glue
 

Enjoy!

Sherry Payne-Scott, AAS ID
__________________________________________________________________________
How fabulous are these fun projects, makes me want to go straight into the garden and build some enchanted and magical diorama's, tiny little homes for our Elfin and Fairy friends!
xoxo
Lisa