Monday, December 22, 2008


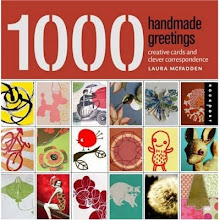
1,000 Handmade Greetings by Laura McFadden and Deborah Baskin

I received an email last week from my publisher that the new book entitled: 1,000 Handmade Greetings by Laura McFadden and Deborah Baskin was now available for order, Then I learned that the amazing, wonderful and super nice Holly Stinnett and I are sharing the same page in the book, I couldn’t share a page with anyone better then that she is amazing and super talented, as are everyone who fills this beautiful book, which I am waiting to get my hands on to.


Holly told me we were on the same page and I got so excited, here is our page, which I borrowed from her blog, you can see her full post here and the rest of her lovely cards on her blog: http://hollylovesart.blogspot.com/ or click on her link to the right in my blog list.

To order this fabulous book click on the link below, this book is filled with amazing artists from all over and I tank Laura and Deborah for including me, they are truly wonderful!

http://www.amazon.com/000-Handmade-Greetings-Creative-Correspondence/dp/1592534732

Thursday, December 18, 2008

Christmas in NYC: Martha Show, Macy's Windows and Tinsel!
On Wed. Dec. 10, 2008, I ventured into the city on the 5:30 am train to Penn Station NYC to meet my dear friend Theresa from Middle School, for the live Martha Stewart Show, we had to be there around 8:00am for our seating.
martha show
It was an unusually warm day with temps around 68/70 degrees so waiting on line wasn't bad, with a cup of Dounkin Donuts in hand, good conversation, Theresa and I were ready to watch Martha Live with special guest: Paula Abdul, and Katie Steuernagle, who makes these adorable animal pull toys, funny thing is I have circus cart pull toys and circus rubber animal toys/dolls in my new book: Altered Art Circus, Quarry Books, Feb.2009 (Now available), buy pre-sale now at: http://www.amazon.com/Altered-Art-Circus-Techniques-Assemblages/dp/1592534872 or visit http://www.quarrybooks.com/
Katie's adorable pull toys put a smile on my face and was by far the best part of the show, even though Paula Abdul looked fabulous and mentioned her new accessory line, which is gorgeous and full of sparkle and glam, a must have for any true diva or for the inner Queen in you.

martha show8
martha show3martha show5
Here is the link for Katie's Pull Toy Project:
http://www.marthastewart.com/article/handmade-holiday-gift-papier-mache-pull-toys?lnc=38f9cf380e1dd010VgnVCM1000005b09a00aRCRD&rsc=showmain_tv_the-martha-stewart-show

The set was decorated in true Martha Stewart Holiday Glam, this 7 segment show was wonderful and so was her staff, I recommend if you get the chance try to go to the show, you will not regret it. Pictures are allowed before and after the show airs, you can take pictures from your seating area, but do not wander around, I think this is a very fair request! Plus you will leave the show with a surprise, we received Giradelli Chocolate, which I'm saving for my opera cake which I make before New Years!

After the Show Theresa and I walked a few blocks over to Macy's (Miracle of 34th Street) to look at all the holiday decorations and window displays. Here are some of my favorite window display pictures from Macy's:


After walking around and looking at all the enchanting Window Display's, Theresa and I walked on over to Phoenix Beads and Tinsel Trading. I had to visit with Marcia and Miss Linda Ashton


while I was there, she is one of the most amazing milliners and super talented, we met through my dear friend Terri, visit Terri's blog to read her post on Linda and take a glimpse in the New York Times for the article http://dimestoedaze.typepad.com/ and NY Times:

http://www.nytimes.com/slideshow/2008/11/26/fashion/20081127-runway_3.html Heather and Terri are wonderful! Love them both!

Now once you enter Tinsel Trading, trust me you won't leave empty handed, I love what Marcia and her staff did with the store displays for the holidays, they had tinsel, vintage holiday goodies and real mica throughout the store, it was pure Tinsel Wonderland and of course I stayed for over an hour chatting with the girls and treasure hunting throughout.

Isn't this adorable, this girl display sits right in the front of the store, for more info on their wonderful findings, books, events, please visit: http://www.tinseltrading.com/

After Tinsel I headed over to Phoenix beads, and then back for to Penn Station for my 4:30pm train home, it was a wonderful day filled with lots of Holiday Magic and Joy!

XO!
Lisa!

Thursday, December 11, 2008

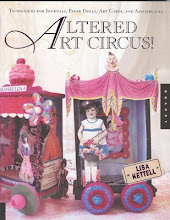
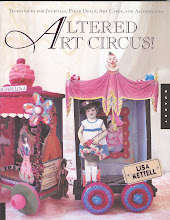
Altered Art Circus, Quarry Books, Lisa Kettell, Now Available!Altered Art Cirus! Front Cover
Altered Art Circus! Back Cover!

Hi All,

My new book:Altered Art Circus, Quarry Books, came in the mail 2 months early, due to the amount of sold advance copies!


Thank You All who are supporting my works. The book is now available! Look for my book signings, tv appearances, workshops, products and more this year.

Here is a scan of the cover and back cover, the cool thing is the lettering is in a metallic pink/violet color emboss, its beautiful! LOL, I think so! The Best Christmas Present I could receive this year! I hope you all enjoy it as much as I do.

Filled with my magical storytelling before each project and/or chapter, filled with real facts, artful techniques/tips/tricks and project variations, Loads of Projects for every level or crafter, artist and designer, create for kids, family, friends or yourself.

There is a contributing guest artist photo gallery in the back with wonderful artists, and several pages of collage images to make many of the projects in the book.

There is loads of artful eye candy here, so pick up a copy, sit in your fave chair or couch and prepare for a magical adventure into my world!

XO!
Lisa!

Visit The wonderful review by Teresa McFayden: http://teresamcfayden.typepad.com/minutia/2008/12/bring-on-the-color.html
Visit Gina Smith's Wonderful Post at:
http://lillysoflondonish.blogspot.com/
Visit Mandy (MayGreen Fairies) Post at:
http://www.maygreen-fairies.blogspot.com/
Visit Laurie (Bewitched Magic) Post at:
http://happy-as-a-lark-designs.blogspot.com/

Friday, December 05, 2008

The Sweet Kewpie Pixie!
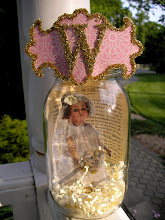
Meet Sugar the Sweet Kewpie Pixie, who loves candy, sweets, and sugar pink, not to mention diamonds are her best friend.
The Sweet Kewpie Pixie! 2
Sugar is now available, ready to sprinkle some sweet magic.

Made from a Coffee Candy Jar with Metal tag still on the jar, vintage kewpie image, crepe paper, mica, antique silver german fine glitter, tinsel, velvet, and other sweet embellishments!


The Sweet Kewpie Pixie! 3
The Sweet Kewpie Pixie! 4! Lid

For purchase info, visit my Etsy Store, to buy Miss Sugar!
http://www.etsy.com/shop.php?user_id=5074220

Wednesday, December 03, 2008

Queenie Twinkles!
Queenie Twinkles!
Here is the finished project I made at Ranger U, http://www.rangerink.com/ in Claudine Hellmuth's Class http://claudinehellmuth.blogspot.com/, she provided us with a plastic binder which we covered in dictionary print, her gel medium and embellishments.

I used her sticky back canvas on the front, drew in my illustration, then painted in with Claudine's Paints, porcelin paint, which I finished when I came home.

I added designer papers, antique silver glitter, millinery flower, chip board flowers, lettering shredds that say "Twinkle", ribbon and my handmade charlotte doll head, along with other fun collage techniques.
Queenie Twinkles!2

It now holds some memories from my Ranger U Weekend!
Also go and check out the Ranger U 2009 Class Schedule and application to join this wonderful art family and learn amazing techniques.

Here is a preview of our class working: My table Leandra to left, Linda to right, me next to Linda, and the rest of our fab table:
http://www.rangerink.com/rangeruniversity.htm

Tuesday, December 02, 2008


My Finished Faerie Shrine Cigar Box!
Pixie Shrine Box!
During my last full day at Silver Bella in Omaha, NE, I took a wonderful class with the amazing Kim Kwan, when I saw Faerie Shrine, I knew that I was taking that class, we all know how much I love fairies (Faerie Zine, Moonfaires World, Faerie Enchantment), LOL!

For this class I picked up the best cigar box I could find, right near my house for $4.50, and this box was the best ever, I loved the graphics on it, so I scanned it in before I left, since I knew it would be totally transformed.

Let me just say, if you ever get the opportunity to take a class with someone, take a class with Kim Kwan http://www.kimberlykwan.typepad.com/
she is amazing, her class was so much fun, more then I could have asked for. Her kits were the best and during the class you had small contests to win goodies, I won one..I was so excited.
Pixie Shrine Box!2
Here is the front of my cigar box, which I completed when I came home. I used cotton candy pink and creme brulee acrylic paints to stripe the front to match the fabric I got from Kim. I then turned that Fabric into a large bow, complete with my vintage pink feathers and rhinestone pin.

Then I added a 1950's greeting card girl image, layered with a thick crepe paper collar, which I distressed and sprinkled with mica and glitter (scroll down for the recipe). Here is a close up of the collar:

Pixie Shrine Box!3Pixie Shrine Box!4Above are examples of the inside of the box, which I glued vintage lettered paper from Kim's Kit to the background, and hand drew a scallop border which I painted in with cotton candy pink paint, followed by a vintage image also from Kim's kit, which I double layered onto card stock with a glue stick and made 3-D with a thick layered crepe paper skirt, glitter, mica and a rounded rhinestone crown.
Here is an upclose look at the 3-D Fairy/Pixie:

I further embellished my box with antique silver folliage, pearly berries, a German Glass Tinsel Bird, Fabric and Ribbon, here is an upclose look of the folliage and berriesPixie Shrine! Details!

For the inside of the cover, I kept the original graphics, for a more unique look! After doing one assemblage, I now want to make a hundred, LOL. Before I move on to the next post, Here is my recipe for distressing crepe paper and letting clear mica flakes look tinted:
Materials:
-Cream Crepe Paper (Use White, or Beige for a substitute)
-Perfect Pearls (Rustic Colors: Gold, Bronze, etc.)
-Martha Stewart Clear Mica Flakes
-Elmers Gel Glue

Directions:
1. Layer the desired art piece with crepe paper such as crepe papering the bottom of a crown base for a ruffled look or using crepe paper to make a doll skirt or a collar.
2. Now cover the crepe paper with the Gel glue, rubbing the glue onto the crepe paper with your fingers, lightly.
3. While the glue is still wet, dip your finger into the perfect pearl color of choice and rub into the wet glue, again, lightly.
4. Rub some more glue onto the top of this, then sprinkle with Mica Flakes, tap off excess and let dry for an hour.

This will give you the same look of the doll collar on my Faerie Shrine Ciagr Box Front Cover.

Other Options:
-Using strong coffee that's been steaping for a day to paint onto the crepe paper, or strong tea.
-Use antique glazing medium to spread onto the crepe paper.

For Dying/Staining Mica Flakes:

Materials:
-Small paper bowl (soup bowl size)
-2 Tablespoons Water
-2 squirts of Tim Holtz Distressing Ink in Walnut
-Clear Mica Flakes by Martha Stewart

Directions
1. Drop 2 Tablespoons water into small bowl
2. Squirt the ink into the water, mix with a craft stick or plastic spoon
3. Pour mica flakes into the bowl until covered, mix, let dry over night.
4. Now decorate your favorite projects!

Options:
-Use other ink colors for different looks
-Try food coloring.