Tuesday, May 22, 2012
Exploring Around Piddlestixs
 Now that the warm weather is here, the real magic begins at Piddlestixs, located in Historic Lafayette, NJ. Everyday I take a hike around the store visiting the sandy beach swimming lake, streams and scenery which engulfs Piddlestixs and neighboring stores, in the summer we even have workshops outside by the covered bridge and picnic area or on the porch, which is visited frequently from friends and loyal customers.


 Here is a close up of the Sandy Lake near the store


 Walking around this area near my store is so peaceful, and feels like you are at the beach for a bit, yet you are in the country and right near my store! In addition there is a volleyball court and fields for sports, how fun is that?


 Come on by Piddlestixs for a visit soon, explore and leave with some magic!
 xoxo Lisa
Labels:
exploring,
hiking,
Historic Lafayette,
New Jersey,
nj,
nj lakes,
Piddlestixs,
sussex county
Thursday, May 17, 2012
Design Team Project
by Amy Mayfield
I had so much fun making today’s project. Lisa offers an AMAZING array of doll bits in her Artfire store and I had been dying to do something with my Charlotte heads. Using the small heads, I created a pretty pixie poppet. What is really wonderful about these is you could easily create your own parade of poppets and add a loop of ribbon to the back to create ornaments. For colorful trees, the assortment above is fabulous. If you want metallics or a more monochromatic look, the Fleur de Lis Flapper heads are a pretty choice and would make marvelous snow fairies or queens and I may have just convinced myself I need them…The set of basic Charlotte heads would be easy to customize for any color scheme–these pieces take paint and glitter extremely well.
For this project, you’ll need:
Your choice of doll heads from Lisa Kettell Designs
Doll bodies printed on cardstock (Mine came from Altered Artifacts on etsy)
Butterfly or fairy wings printed on cardstock (you could also use silk ones)
Crown paper punch
Adhesive rhinestones
Stickles in Diamond
Various fabric trims and ribbon
Thin wood craft sticks
Fine glitter (I like Martha Stewart glitters)
Glue, scissors, hot glue gun, etc
Directions:
I started by cutting out the doll body and attaching her head. I did sand the back of her head down just a touch to make it a little flatter. She was attached to the body using a glue stick and then I positioned the wings, legs and arms.
Next, I created her crown by using a crown paper punch and covering it in Martha Stewart glitter in Sterling. Shake off the excess and set aside to dry. I used a piece of trim for her skirt and held it in place with hot glue and accented the waist with a fun, fluffy bit of pink fiber. After this was attached, I outlined her wings and shoes in Diamond Stickles and created her a necklace with tiny silver adhesive rhinestones. Her crown is simply attached to the back of her head with a dot of hot glue and then it got accented with pink adhesive rhinestones. Once she was all together, I used hot glue to apply a craft stick–just to make her a little more sturdy. If you wanted your pixie poppet to be an ornament, just loop a bit of ribbon under the craft stick as you glue it in place.
This is a project that could easily be done with little ones–just help them with the hot glue gun and such. These would make great gifts for them to give for Christmas to friends and family. Here’s the finished project:
Doesn’t she look like she’s been sprinkled with a pinch of pixie dust?
___________________________________________________________________________________
I love love love this project, so magical and enchanting I could see an army of these, a pixie army that is!, Love, off to make some of my own, thanks so much Amy! :-)
xoxo
Lisa
Wednesday, May 16, 2012
Clearsnaps Design Team 2012
 The biggest surprise came in the mail the other day, a HUGE box from Clearsnaps for me as being part of the 2012 design team. You have to check this out, it was so heavy to lift, I might need to lift weights at the gym for a few days, lol. Come see a sneak peak at what was inside!

 Oh and even my cat Lucky got involved, his new role is guardian of the supplies and my new assistant, lol.


 Here are some more pictures of the fabulous goodies!


 And for glitter or jazzing up!
 How amazing is this stash of incredible products, now the fun begins, deciding what i'm going to make using all this, the ideas are whirling, stay tuned for some Lisa-esque projects for Clearsnap!
xoxo
Lisa :-)
xoxo
Lisa :-)
Monday, May 14, 2012
New in the store: Metal Lined Baseball Cuffs

Going forward all baseball cuffs and sports cuffs will come metal lined w/o a clasp which I have found makes for better contour to fit your wrist, rather then clasps. If you still want a clasp, you can have one, but I recommend the metal form instead.
 I don't always have the same baseball in stock, especially the specialty baseballs like the one pictured here, I mostly use MLB Rawlings Baseballs, I do get little league and used ones in all the time, so make sure they are in stock. If there is a style baseball I had done before let me know that as well.


 Another recommendation I must add is, ordering an all white, white stitched cuff, washes out the cuff and the one wearing it. If you want as white as possible, add at least a pearl strand to the white leather baseball and white stitching or if no pearls go for an off white stitching, this will add some element to the starchness of the baseball.
 Like the one above, this one is all white as can be with tiny pearls laced between the stitching.
 These are the basic red stitched cuffs.

 Keep in mind, this is my busiest time of year during baseball season, please allow 2-3 weeks for customization, finish and shipping. If you need sooner for an event please allow for ordering time and inform me as well.
Have a great day,
xo
Lisa
Going forward all baseball cuffs and sports cuffs will come metal lined w/o a clasp which I have found makes for better contour to fit your wrist, rather then clasps. If you still want a clasp, you can have one, but I recommend the metal form instead.
Have a great day,
xo
Lisa
Thursday, May 10, 2012
Guest Designer
Susan Dietz
Enchanting Spring Tags
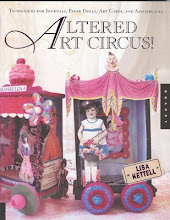
Here is an amazing altered tag that Susan made using one of our collage images from Lisa Kettell Designs, which are also found in the back of my book: "Altered Art Circus", which has several pages of images for you to use in your art works.
I just love Susan's work, who is the creative face behind: "Flutter Before You" which is filled with enchanting and vintage designs that are sure to excite the inner fairy in you, from cake toppers to journals, books and vintage finds, Susan's shop will appeal to all.
I just love what Susan did to these tags using a variety of items, my fave is the whimsical polka dot background on this tag. Which really enhances the main image, just too amazing!
For more info on Susan visit her blog at: http://flutterbeforeyou.blogspot.com
I'm so excited now to make tags, thanks Susan for inspiring all of us! Can't wait to see what else you come up with.
xoxo
Lisa
Susan Dietz
Enchanting Spring Tags
Here is an amazing altered tag that Susan made using one of our collage images from Lisa Kettell Designs, which are also found in the back of my book: "Altered Art Circus", which has several pages of images for you to use in your art works.
I just love Susan's work, who is the creative face behind: "Flutter Before You" which is filled with enchanting and vintage designs that are sure to excite the inner fairy in you, from cake toppers to journals, books and vintage finds, Susan's shop will appeal to all.
I just love what Susan did to these tags using a variety of items, my fave is the whimsical polka dot background on this tag. Which really enhances the main image, just too amazing!
In Susan's Words:
The renewal of life again,blooming trees with soft pink and
white petals,the bright yellows of daffodil's swaying in the breeze, and
the scattering of tulips and purple hyacynth...Oh how I LoVe SpRinG!
I've Been busy making a few tags to share with you too! I am really
loving these Vintage circus inspired images from Lisa Kettell... So
stinking cute!!! I'm feeling like a butterfly coming out of seclusion
and cacoon state, emerging out into the warmth of the sun to dry my
wings.....flexing,stretching, feeling renewed energy, gaining
strength, preparing to FLY!!!
For more info on Susan visit her blog at: http://flutterbeforeyou.blogspot.com
I'm so excited now to make tags, thanks Susan for inspiring all of us! Can't wait to see what else you come up with.
xoxo
Lisa
Wednesday, May 09, 2012
Steampunk Goddess Necklace
By Joan Kettell
 There is something so extraordinary about Steampunk and its many properties. It can have a timeless Neo-Victorian look, a bit of Apothecary Flare, A Horologist Essence, A Sci-Fi Twist, some Jules Verne Influence, Cosplay/Lolita Fun, Circus Oddity, Industrial Chic, Recycled Splendor, Wild West Mechanics, Alchemist Mystery, the Magic of Astronomy and Space, a Celestial Ride into the world of Moon-ology and you got Steampunk.
With this many options, who wouldn't want to start creating works revolving around this eclectic range of themes under one main roof. You can mix time gears, dials, industrial washers, and charms, viola you have a steampunk piece. Think of tiny bottles wrapped in wire for a necklace charm, hardware store washers embedded with stamped numbers, clock parts and casings filled with tiny eclectic scenes, top hats that are tricked out, boats and balloon travel, there are just so many places you can travel to within the realm of Steampunk.
The piece I am showing casing for you today is made by one of the greatest woman I know, my mom, Joan Kettell aka Aurora-tique who got infect by the Steampunk bug over 3 years ago, since then Joan has made over 2,000 pieces and has sold to customers world wide, taught some classes, been interviewed from various papers and media outlets all in an attempt to help spread the word on this fascinating subject.
Here are some more photos of her newest piece: Steampunk Goddess Necklace, which is now available for sale in the online store:
http://www.artfire.com/ext/shop/product_view/MoonfairesWorld/4678564/Steampunk_Goddess_Necklace_Celestial_Joan_Kettell/Jewelry/Necklaces/Metal

 Here is the back of the necklace:
 Here is the necklace in full view:
 Here are some more pictures of Joan's newest Steampunk pieces, all available in the store on line or at Piddlestixs:
 If you don't see a piece, then its sold out, similar ones can be made through custom ordering!
I hope you enjoy seeing a glimpse into Joan's Steampunk world!
xoxo
Lisa!
By Joan Kettell
With this many options, who wouldn't want to start creating works revolving around this eclectic range of themes under one main roof. You can mix time gears, dials, industrial washers, and charms, viola you have a steampunk piece. Think of tiny bottles wrapped in wire for a necklace charm, hardware store washers embedded with stamped numbers, clock parts and casings filled with tiny eclectic scenes, top hats that are tricked out, boats and balloon travel, there are just so many places you can travel to within the realm of Steampunk.
The piece I am showing casing for you today is made by one of the greatest woman I know, my mom, Joan Kettell aka Aurora-tique who got infect by the Steampunk bug over 3 years ago, since then Joan has made over 2,000 pieces and has sold to customers world wide, taught some classes, been interviewed from various papers and media outlets all in an attempt to help spread the word on this fascinating subject.
Here are some more photos of her newest piece: Steampunk Goddess Necklace, which is now available for sale in the online store:
http://www.artfire.com/ext/shop/product_view/MoonfairesWorld/4678564/Steampunk_Goddess_Necklace_Celestial_Joan_Kettell/Jewelry/Necklaces/Metal
I hope you enjoy seeing a glimpse into Joan's Steampunk world!
xoxo
Lisa!
Subscribe to:
Comments (Atom)


